Complete Installation & Configuration Guide for Geniki Taxydromiki Voucher for WooCommerce
In this guide you’ll see, step-by-step, how to install and configure Geniki Taxydromiki Voucher for WooCommerce, how to correctly enter the test/live Web Services provided by Geniki Taxydromiki, how to complete the required test scenario (issue / print / cancel voucher + close pending tasks) and how to use the plugin daily inside WooCommerce orders, with tracking & email notifications.
Contents
1) Before you start (Web Services from Geniki Taxydromiki)
For the plugin to work, you need the Web Services from Geniki Taxydromiki. Usually, the courier provides test credentials first (test environment) and, once the test scenario is successfully completed, they provide the live credentials (production).
You will need:
Username
Password
Application Key (API Key / AppKey)
2) Install & activate
Installation is the same as with any WooCommerce plugin:
Log in to WordPress as an administrator.
Go to Plugins → Add New.
Click Upload Plugin.
Select the .zip file you downloaded after purchase.
Click Install Now and then Activate.
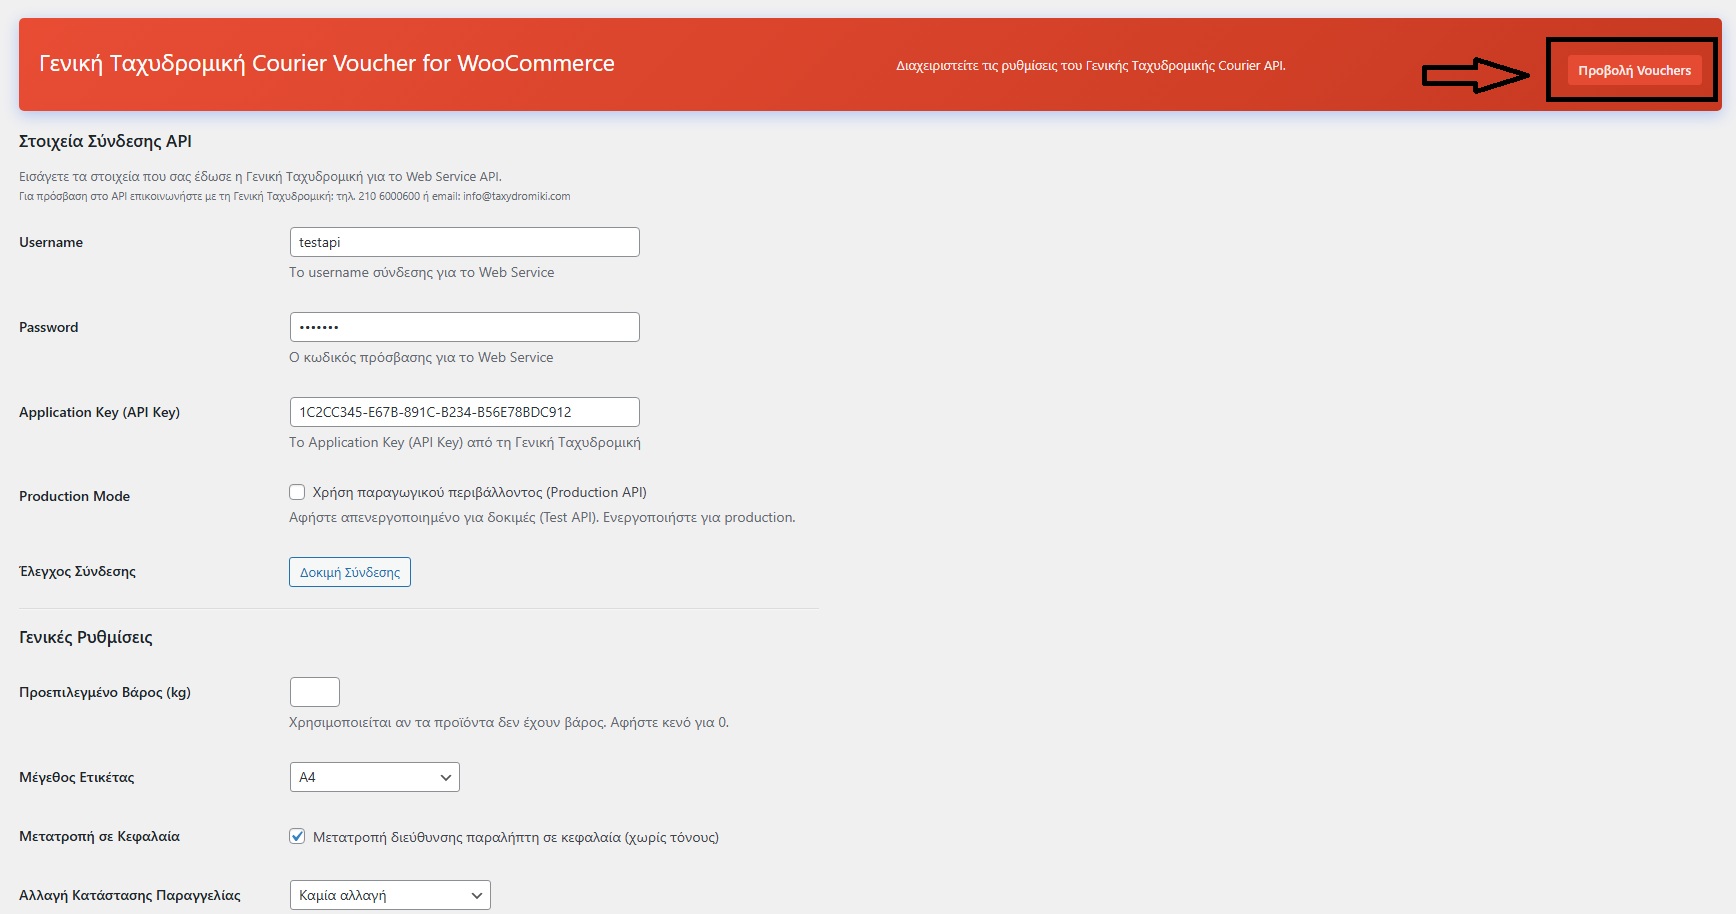
3) API connection settings (Web Services)
Open the plugin settings page (e.g. from VGDev Solutions → Geniki Taxydromiki).
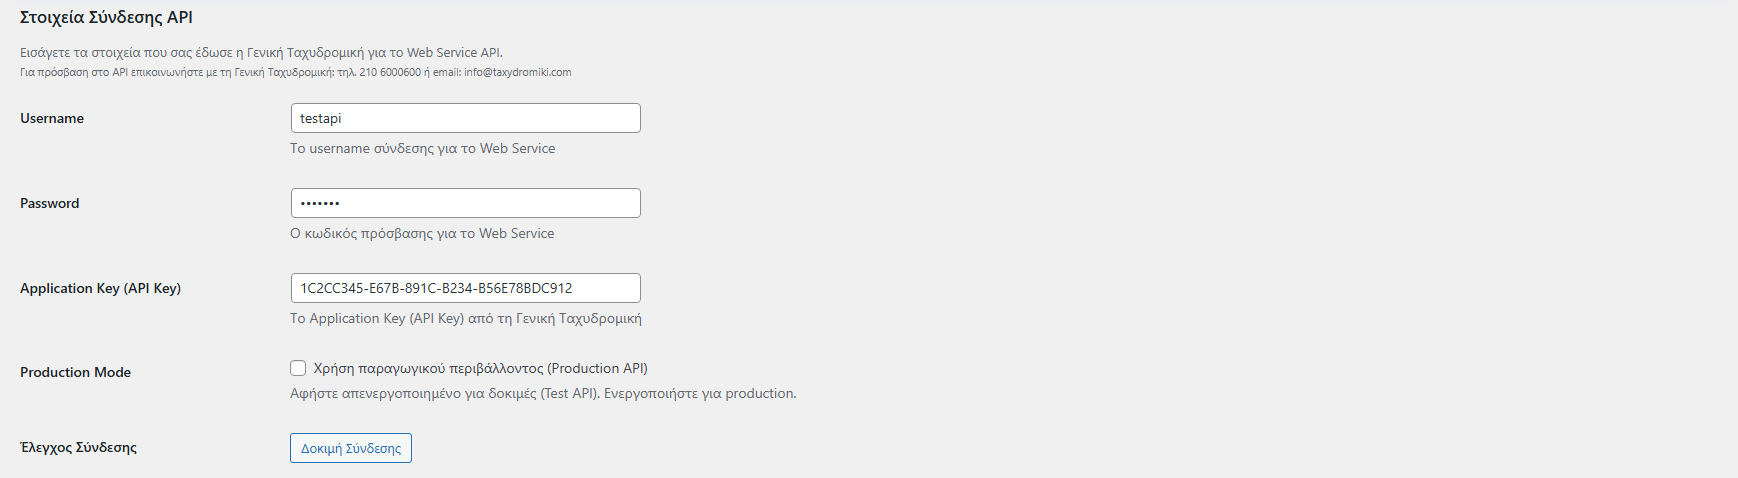
API connection details
Fill in:
Username
Password
Application Key (API Key / AppKey)
Save & Test Connection (correct order)
After entering the credentials:
Click Save Settings to store the new values.
Then click Test Connection to confirm that communication with Geniki Taxydromiki works correctly.
Production Mode (Test / Live)
The plugin includes a Production Mode option:
Test credentials: keep Production Mode disabled.
Live credentials (production): enable Production Mode.
4) General settings (weight, label size, status, etc.)
In General Settings you’ll find options that affect the daily workflow.
Default weight (kg)
The Default weight (kg) field works as a “fallback” when the order weight cannot be calculated.
If you leave it empty, the plugin reads product weights from WooCommerce and calculates the total order weight automatically.
If some products don’t have weight, set a safe fallback value (e.g. 0.5kg or 1kg) so voucher creation won’t fail.
Important: A voucher cannot be created for an order with zero weight (0).
Tip: Ideally, fill in weight for all products.
Label size
From Label Size you choose the default voucher print format. Available options are:
Sticker (10×15 cm)
Sticker Big (10×19 cm)
A4
A5
Convert to uppercase
If you want the recipient details (address, etc.) to be converted to uppercase (without accents), enable this option.
Order status change
If you wish, you can set an automatic order status change when a voucher is created (or leave it unchanged).

5) Test mode (Geniki Taxydromiki test scenario)
Geniki Taxydromiki usually requires confirmation that the following work properly:
voucher creation
voucher printing
voucher cancellation
closing pending tasks (end of day)
Test Web Services format
The test credentials you receive usually look like:
username: testapi
password: 123456@
appkey: 1C2CC345-E67B-891C-B234-B56E78BDC912
Enter them in Username / Password / Application Key (API Key).
Step-by-step test
Enter the test credentials in the plugin settings and click Save Settings.
Make sure Production Mode is disabled (test).
Create a test WooCommerce order or open an existing order with status Processing.
In the voucher box on the right side, click Create voucher.
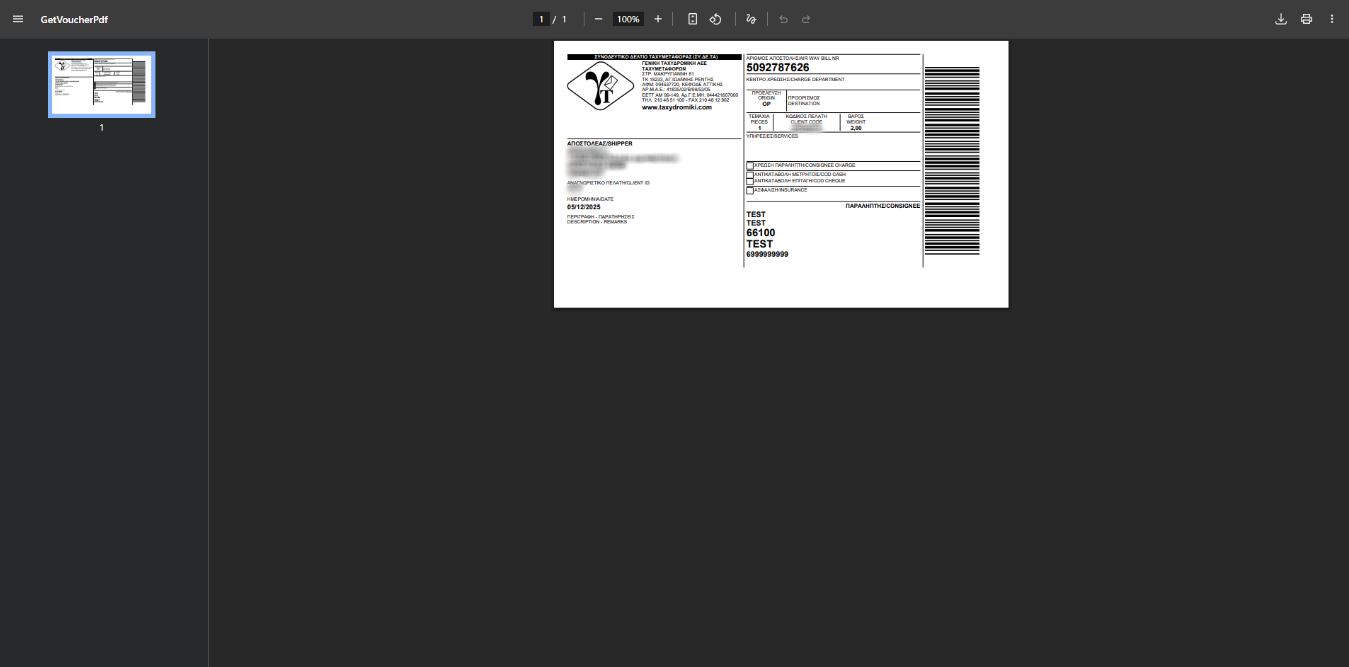
Click Print and save the test voucher PDF.
Perform Close Pending Tasks – Today (see section 6).
Return to the order and click Cancel for the voucher.
Email Geniki Taxydromiki confirming the test is completed, attaching the PDF (and anything else they request).
When you receive the live credentials:
replace them in the plugin settings,
enable Production Mode,
click Save Settings.
Warning: Don’t accidentally remain on test credentials, otherwise you will keep generating test vouchers.
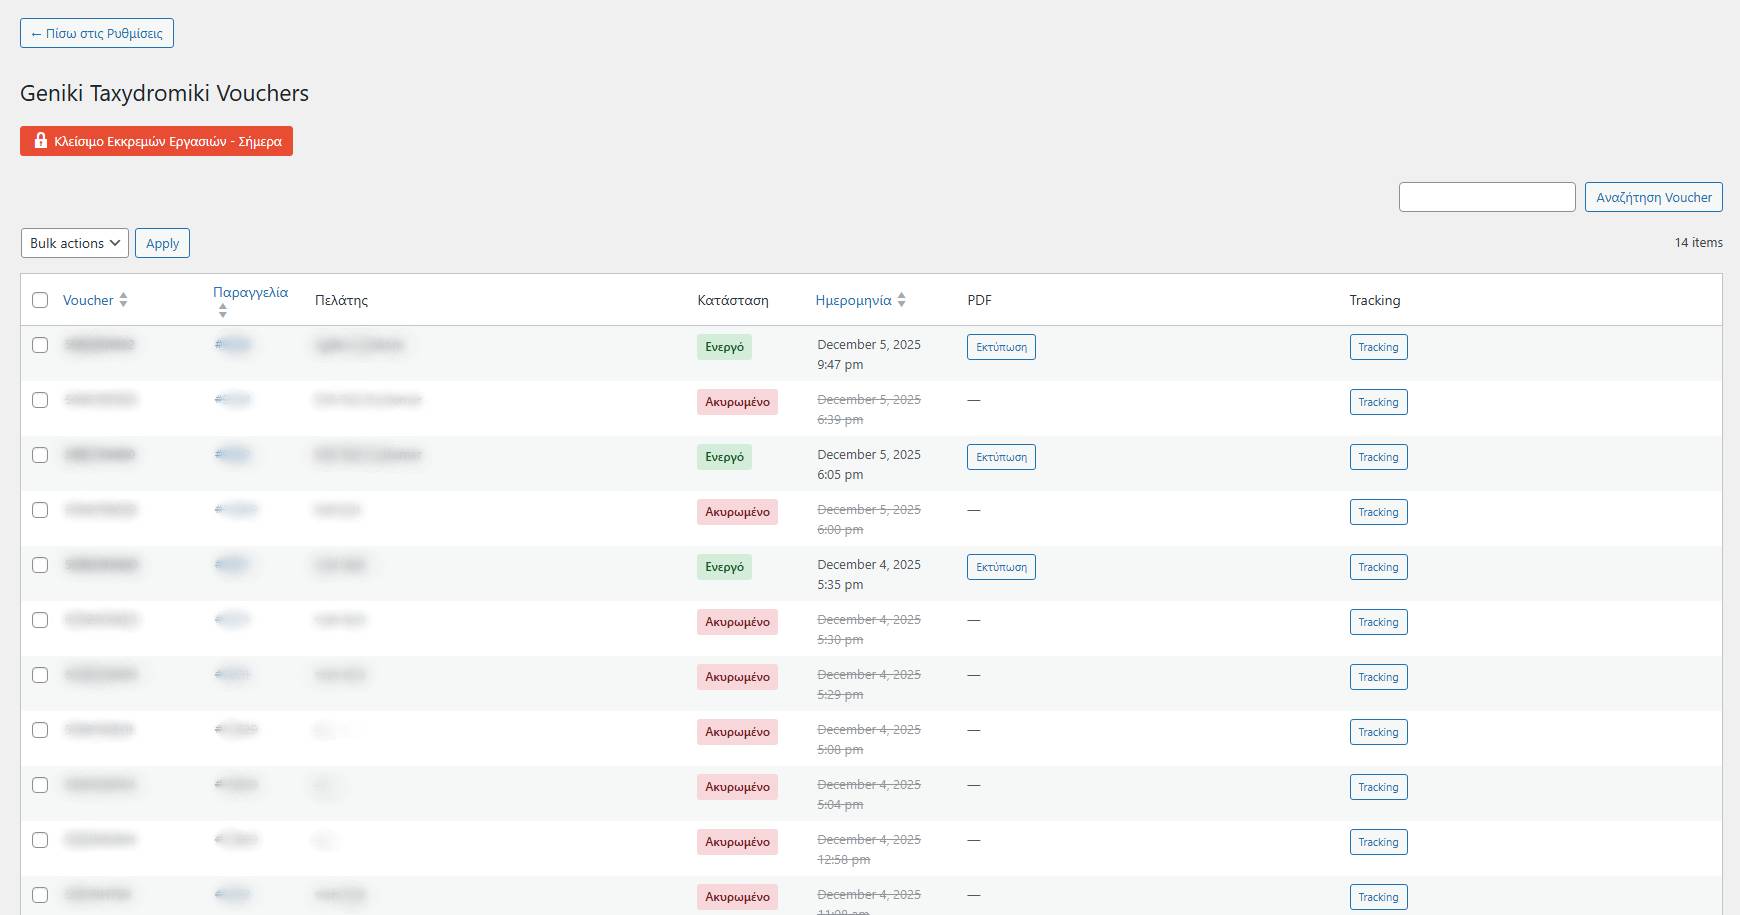
6) Close Pending Tasks (end of day)
Close Pending Tasks is the “end-of-day” process that updates Geniki Taxydromiki’s system with the vouchers issued and ready for dispatch.
How to do it (inside the plugin)
Go to the plugin settings (VGDev Solutions → Geniki Taxydromiki).
At the top (header) of the settings page, click “View Vouchers”.
The Geniki Taxydromiki Vouchers list will open (active & canceled vouchers).
Click “Close Pending Tasks – Today”.
When to do it
At the end of the day, after you have issued all vouchers that will be shipped.
If you create a new voucher after closing pending tasks, you must run Close Pending Tasks – Today again so it is included.
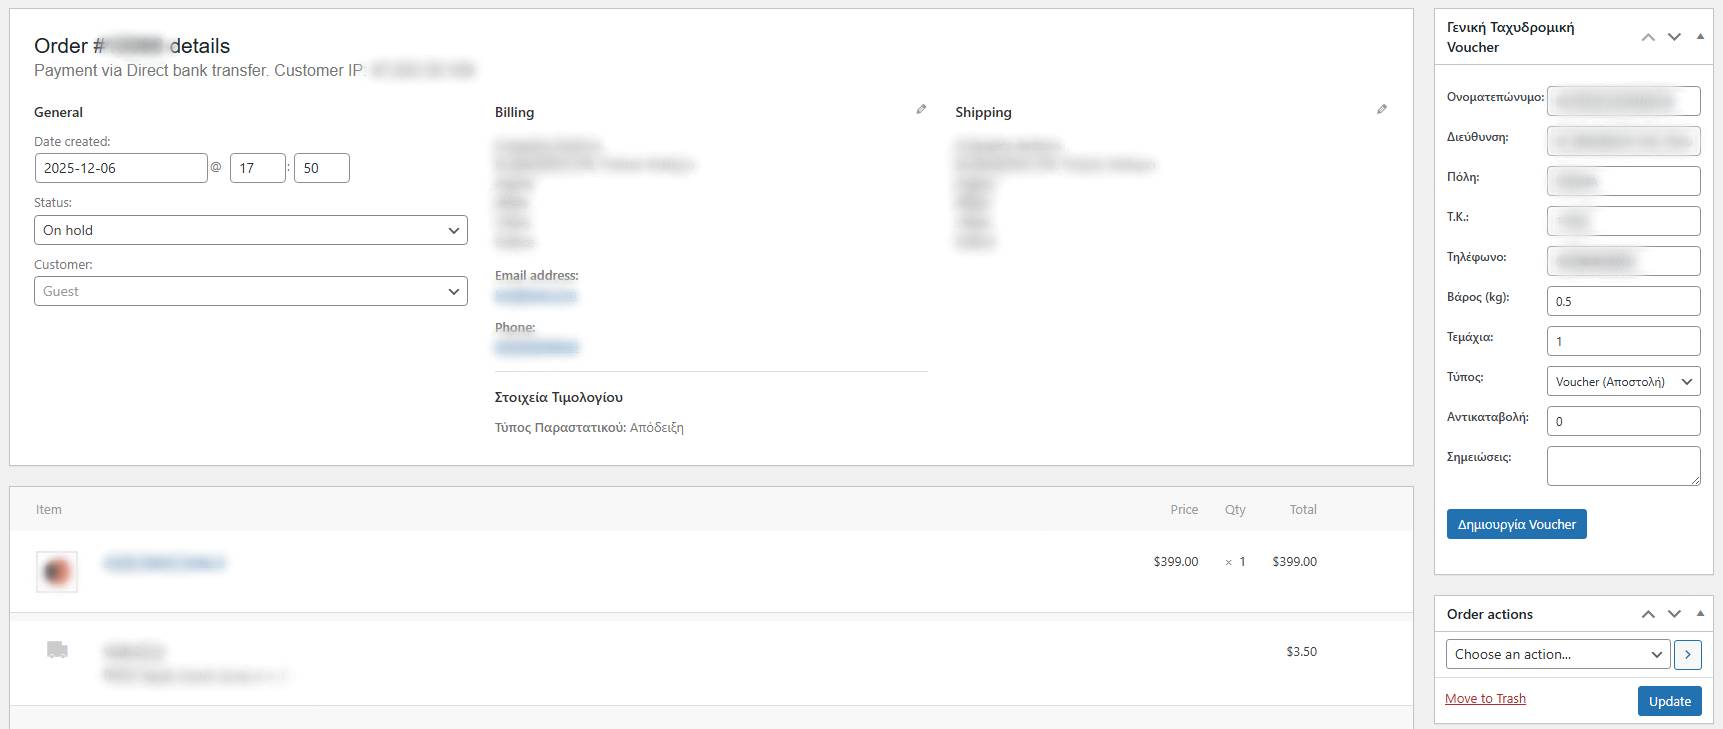
7) Create a voucher from the order (daily use)
After configuration, the main workflow happens inside the order:
Go to WooCommerce → Orders
Open the order
In the voucher box, click Create voucher
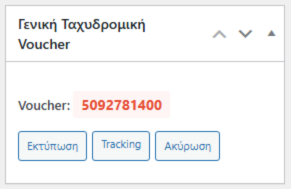
After creation, you typically have options such as:
Print (PDF voucher)
Cancel voucher
Tracking / shipment status (if supported)
Useful voucher fields
In the voucher panel you may see fields such as:
Parcels (default 1)
Weight (set manually if not calculated automatically)
Cash on Delivery (if the payment method is COD)
Services (e.g. Saturday delivery—if supported)
Comments
Important for cancellations: Before canceling a voucher, follow Geniki Taxydromiki’s official procedure (often requires contacting them).
8) View Vouchers (list, PDF, tracking)
From “View Vouchers” (in the header of the settings page) you get a consolidated list with:
Active and Canceled vouchers
Link to the related order
Date
Print (PDF) button
Tracking button (where supported)
This list is also where you run Close Pending Tasks – Today.
9) Email Tracking & Preview
In Email & Tracking Settings you can enable:
Sending a tracking email to the customer when the order is completed
Selecting a color for the tracking email (button/border)
Preview to see how the email will look before enabling it
10) Debug Mode (logs)
There is a Debug Mode option to record requests/responses in a log file for troubleshooting.
Use it when:
voucher creation fails
printing/PDF download issues occur
you need technical info for support
Warning: Don’t leave Debug Mode enabled without a reason.

11) Frequently Asked Questions (FAQ)
Voucher is not created — what should I check first?
Make sure you clicked Save Settings before Test Connection.
Check the order weight is not 0.
Confirm the API credentials (Username / Password / AppKey) are correct.
Confirm recipient details are correct (address/postal code/phone).
When should I enable Production Mode?
Only when you enter live credentials.
With test credentials, Production Mode must be disabled.
Do I need to “Close Pending Tasks” every day?
Yes — it’s essentially the end-of-day closing procedure.
If you create new vouchers after closing, run Close Pending Tasks – Today again.
12) Print dimensions
The plugin supports the available voucher print sizes provided by Geniki Taxydromiki via Web Services. From “Label Size” you can select:
Sticker (10×15 cm): 10×15 cm label
Sticker Big (10×19 cm): 10×19 cm label
A4: A4 print
A5: A5 print
Note: Vouchers are returned as-ready templates from Geniki Taxydromiki Web Services. Choose the format that matches your printing workflow (A4/A5 printer or thermal/label printer for sticker formats).
13) Support
For any issue or question regarding setup or usage, you can contact technical support at info@vgdevsolutions.gr