Complete Installation & Configuration Guide for Speedex Voucher for WooCommerce
In this guide you will see step-by-step how to install and configure
Speedex Voucher for WooCommerce, how to correctly enter Speedex test/live
Web Services, how to complete the required test scenario and how to use the plugin daily
directly from WooCommerce orders.

What we are going to configure
Speedex Voucher for WooCommerce connects your store with Speedex Web Services, so you can issue, print, cancel and track vouchers directly from WooCommerce orders.
1) Before you start
For the plugin to work, Speedex Web Services are required. Speedex typically provides test credentials first for the test environment and, after the test process is successfully completed, provides the live credentials for production.
You will need:
- Username
- Password
- Customer ID
- Agreement ID
2) Installation & activation
Installation is the same as with any WooCommerce plugin.
.zip file you downloaded after purchase.
3) API connection settings
Open the plugin settings page, for example from VGDev Solutions → Speedex Courier.
API connection details
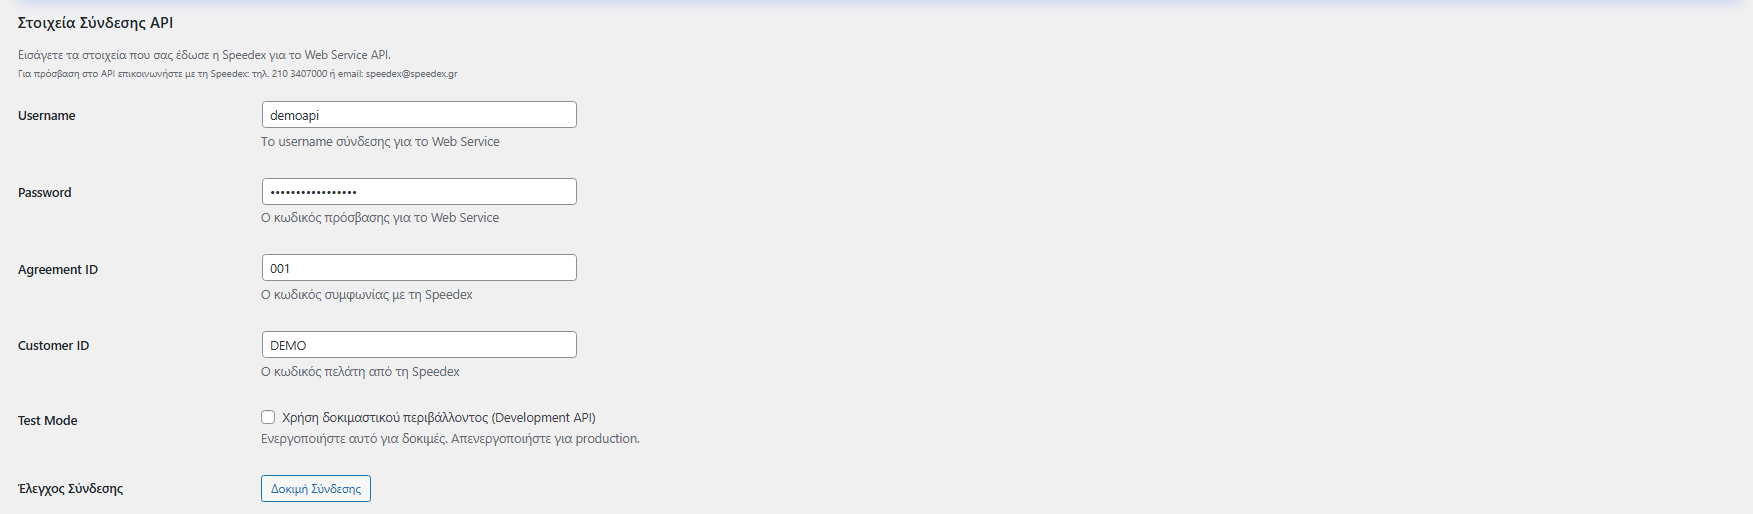
In the API connection details section, enter:
- Username
- Password
- Agreement ID
- Customer ID
Save & connection test
- First click Save settings, so the new credentials are stored.
- Then click Connection Test to confirm that communication with Speedex is working properly.
Test Mode
- If the credentials you received are for testing, enable Test Mode / Development API.
- If the credentials are live, keep Test Mode disabled.
4) General settings
In the General Settings section, you will find options that affect day-to-day operation.
Default weight
The Default weight (kg) field acts as a fallback when weight cannot be calculated.
- If you leave the field empty, the plugin automatically pulls weights from your WooCommerce products and calculates the total order weight.
- If you have products without weight, set a safe value such as
0.5, so voucher creation does not fail.
Printing size
From the Printing Size field, you can choose the default voucher print format.
- A4
- A5
- A6
- 10×21 cm
Convert to uppercase
If you want recipient details, such as address and other fields, to be converted to uppercase without accents, enable this option.
Change order status
You can set an automatic order status change when a voucher is created, or keep the setting without change.

5) Test operation
Speedex typically requires confirmation that the main parts of the integration work correctly.
- Voucher issuance.
- Voucher printing.
- Voucher cancellation.
Instructions for entering test Web Services
Example format of test credentials:
- Username:
demoapi - Password:
GOOD-GO-HOME-GUYS - Customer ID / Agreement ID:
DEMO–001,DEMO–002,DEMO–003,DEMO–004
Enter Username / Password in the Username / Password fields.
Then choose a Customer ID, for example DEMO,
and an Agreement ID, for example 001,
and enter them in the corresponding fields. Finally, enable Test Mode.
Step-by-step test
- Enter the test Web Services in the plugin settings and click Save settings.
- Enable Test Mode and click Save settings again, if required.
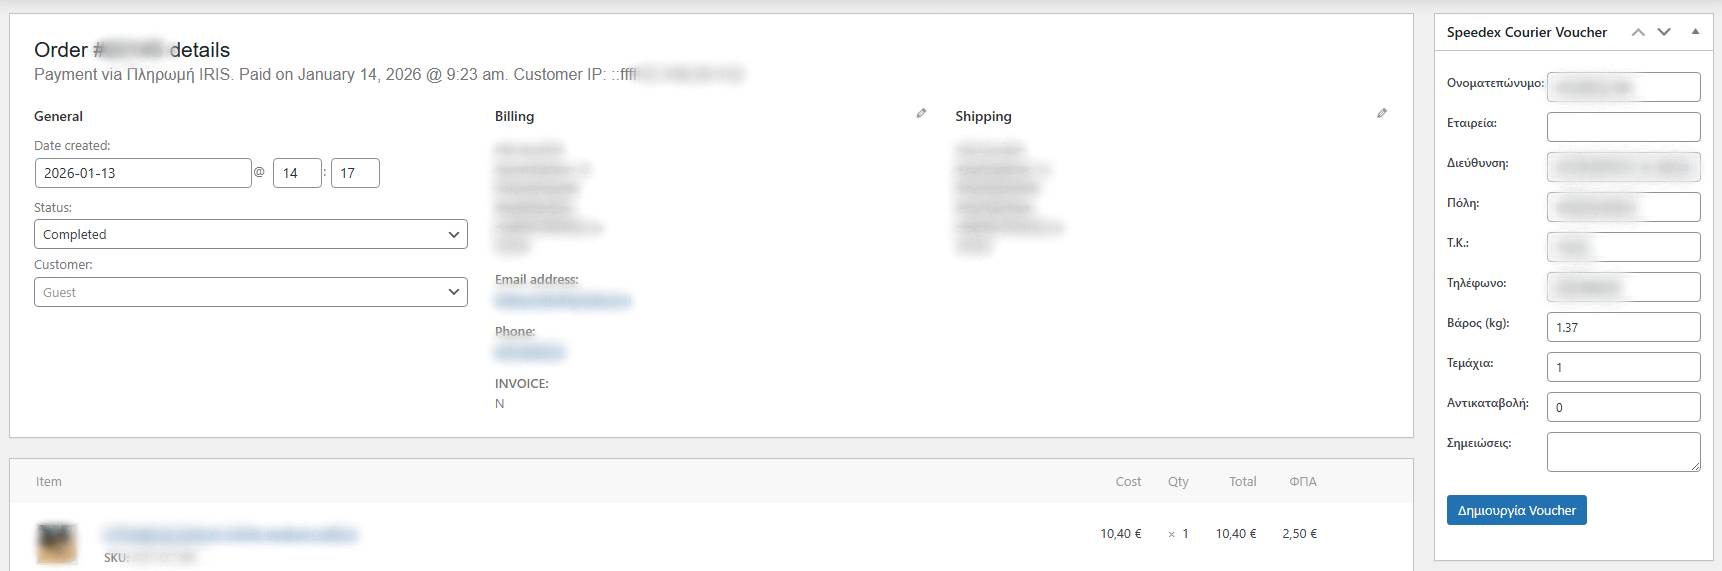
- Create a test WooCommerce order or open an existing order with status Processing.
- In the order’s right sidebar, inside the Speedex Courier Voucher box, click Create voucher.
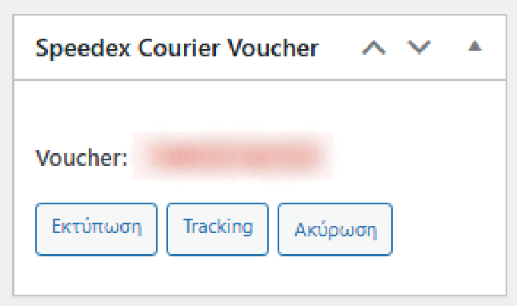
- Once the voucher is successfully created, the voucher number appears and the Print, Tracking and Cancel buttons become available.
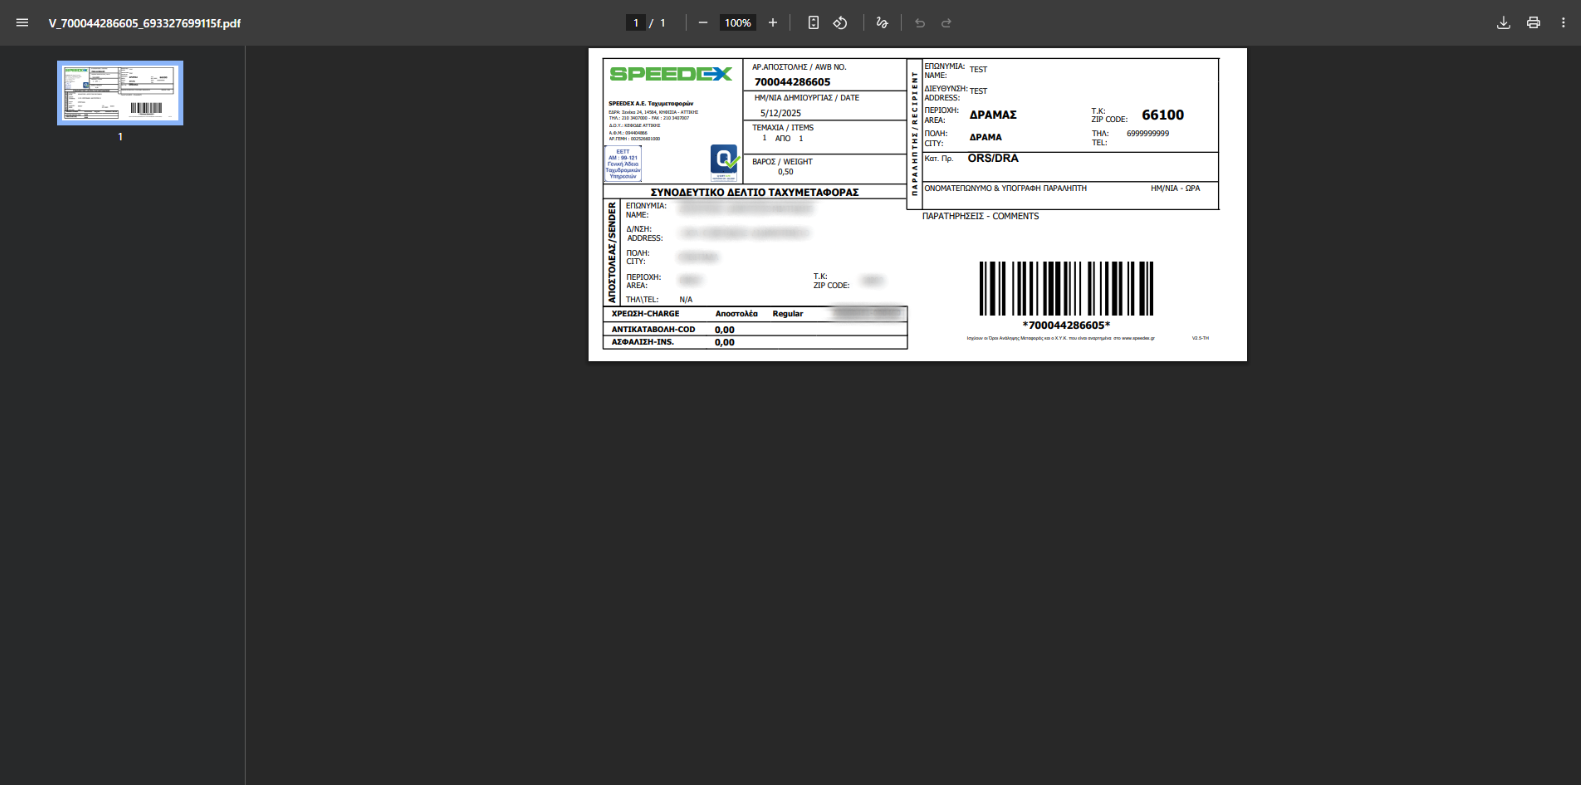
- Click Print and save the voucher PDF.
- To complete the test scenario, click Cancel.
- Notify Speedex that the test has been completed and attach the test voucher PDF.
- Wait for the live Web Services and replace the test credentials in the settings.
- Disable Test Mode and click Save settings.
6) Issuing a voucher from the order
After setup, the main workflow happens directly inside each WooCommerce order.
- Go to WooCommerce → Orders.
- Open the order.
- In the Speedex Courier Voucher box, click Create voucher.
After issuance, you can use:
- Print: download the voucher PDF.
- Tracking: view shipment tracking.
- Cancel: cancel the voucher when needed.
Helpful information
Inside the voucher panel, you may see fields such as:
- Parcels: number of parcels, with default value 1.
- Weight: set manually if it cannot be calculated automatically.
- Pickup date: the date the parcel was handed to the courier.
- COD: appears when the payment method is cash on delivery and can be adjusted.
- Saturday delivery: used so this information is printed on the voucher.
- Comments: additional shipping notes.
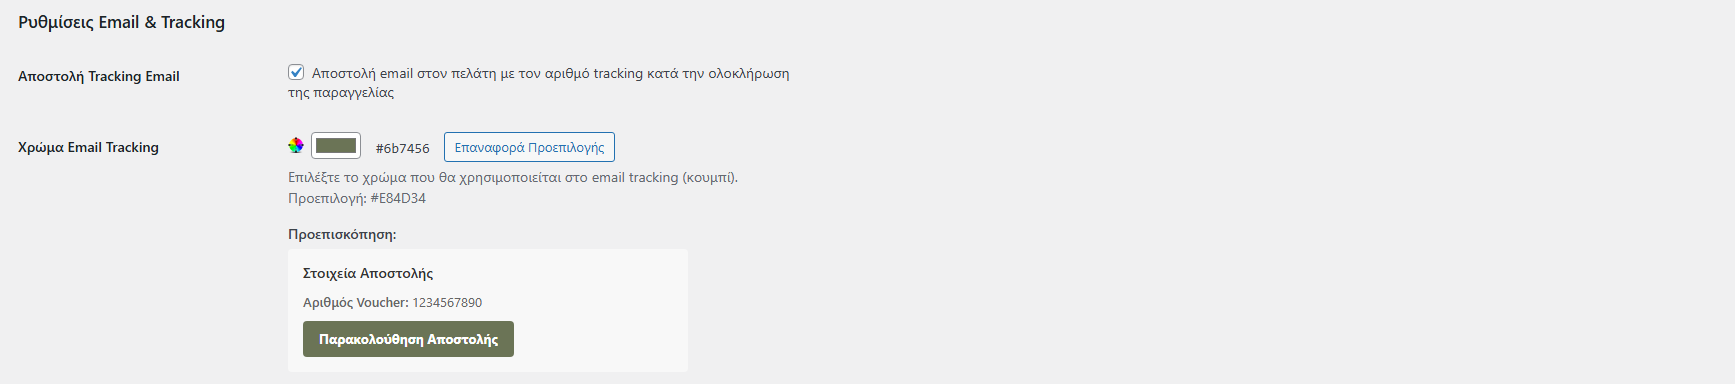
7) Email Tracking & Preview
In the Email & Tracking Settings section, you can enable customer notification for shipment tracking.
- Send a tracking email to the customer when the order is completed.
- Choose a color for the email tracking button or style.
- Preview the email before enabling it.
8) Debug Mode
There is a Debug Mode option that logs API requests and responses to a log file for troubleshooting.
Use it when:
- Voucher creation fails.
- There is an issue printing or downloading the PDF.
- You need to send technical information to support.

9) Frequently Asked Questions
- Make sure you clicked Save settings before running Connection Test.
- Check that the Username / Password are correct.
- Confirm that the Customer ID / Agreement ID match the correct agreement.
- Check that the order weight is not
0. - Enter weights for your products or set a Default weight, such as
0.5. - Confirm that recipient details are correct, such as address, postcode and phone number.
- Only when you are using test credentials.
- With live credentials, Test Mode must be disabled.
10) Printing sizes
The plugin supports the available voucher print sizes provided by Speedex through Web Services. From the Label Size setting, you can choose:
- A4: print in A4 size.
- A5: print in A5 size.
- 10×21 cm: print in 10×21 cm dimensions.
- A6: print in A6 size.
11) Support
For any issue or question regarding the setup or operation of the plugin, you can contact technical support.