
Complete Installation & Configuration Guide for Skroutz Smart Cart for WooCommerce
In this guide, you’ll see step-by-step how to install and configure the plugin so you can receive
orders from Skroutz Smart Cart inside WooCommerce, using the API Key and
Webhook URL exactly as they appear in the plugin settings.

What we are going to configure
The Skroutz Smart Cart integration for WooCommerce requires a correct plugin installation, an active license, API connection, and webhook setup so Skroutz orders can be sent directly to your WooCommerce store.
1) Before you start
To ensure the integration works correctly, make sure you have the following:
- An active WordPress website with WooCommerce installed.
- Access to the Skroutz Merchant panel for the API token and Webhook.
- SSL enabled on your domain, meaning the site loads through
https. - Your products must match what Skroutz sees for your Smart Cart / marketplace setup.
2) Installation & activation
Installation is the same as with any WooCommerce / WordPress plugin.
.zip file from your purchase.
3) License activation
On the plugin settings page, you will see the message License Required until the license is activated.
- Click Activate License.
- Enter the license details you received with your purchase.
- Once activated, the plugin features will be available normally.
4) API Configuration
4.1 API Key from Skroutz
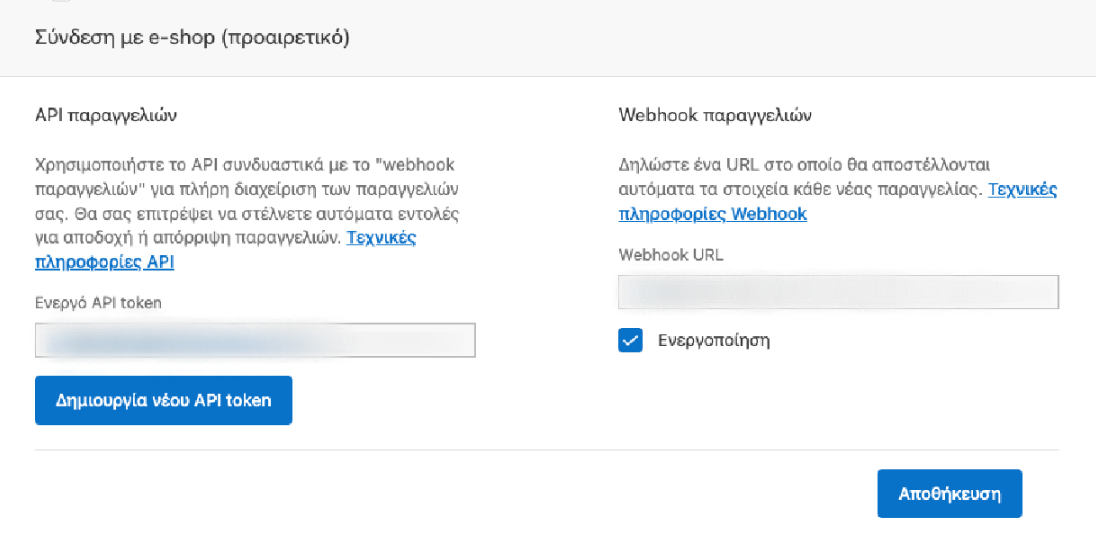
In the Skroutz Merchant panel, under the e-shop connection section, you will need to create and copy the API token.
- Find the Orders API section.
- Click Create new API token.
- Copy the token.
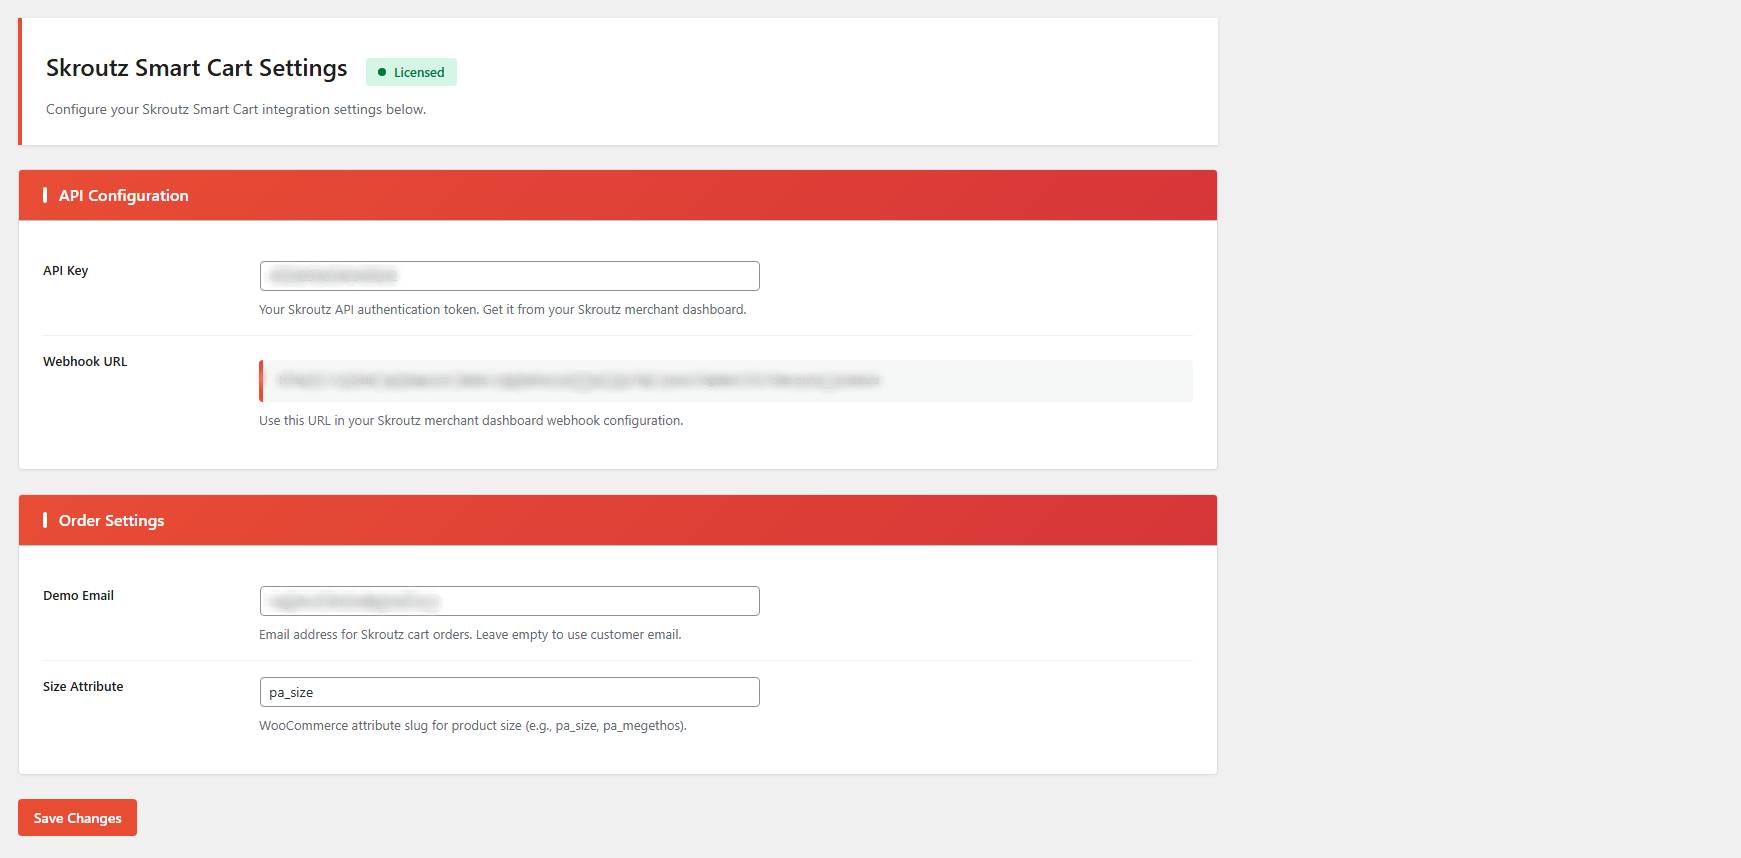
- In WordPress, go to the plugin settings → API Configuration → API Key field and paste the token.
4.2 Webhook URL from the plugin to Skroutz
In the plugin settings, you will see a ready-to-copy Webhook URL,
usually an endpoint like /wp-json/....
- Copy the Webhook URL from the plugin.
- In the Skroutz Merchant panel, go to the Orders Webhook section.
- Paste it into the Webhook URL field.
- Enable the Enable checkbox.
- Click Save in Skroutz.
5) Order Settings
5.1 Demo Email
In the Demo Email field, you can set an email address that will be used for Smart Cart orders.
- If you leave it empty: the plugin may use the customer’s email, depending on the plugin UI/settings.
- If you set a demo email: this is useful for staging, testing, or when you want all Smart Cart orders to use one specific email address.
5.2 Size Attribute
The Size Attribute field expects the WooCommerce attribute slug that represents size,
such as pa_size or pa_megethos.
- Find it under Products → Attributes and use the attribute slug.
- If Skroutz sends size selections and you want correct variation matching, this setting is important.
6) Testing the integration
After the setup is complete, run a practical check to confirm that everything works correctly.
- You have entered a valid API Key in the plugin.
- You have pasted the plugin’s Webhook URL into Skroutz.
- The webhook is Enabled and you have clicked Save.
- Place a test order from the Skroutz environment, if available.
- Check WooCommerce → Orders to confirm that a new order has been created.
7) Frequently Asked Questions
- Did you click Save in Skroutz after adding the webhook?
- Is the Enable checkbox active for the webhook?
- Is the site accessible through HTTPS?
- Is there any firewall, WAF, or cache layer that may be blocking webhook requests?
- Create a new API token from Skroutz.
- Replace the old token in the plugin’s API Key field.
- Save the plugin settings again.
- Check that the Size Attribute field contains the correct slug, for example
pa_size. - Make sure your WooCommerce variations use the same attribute.
8) Support
For any issue or question related to the plugin setup or functionality, you can contact technical support.